Have you ever noticed tiny web-like structures or small spots on your plants?
Chances are, these could be signs of spider mites, tiny but troublesome pests that love to live on plants, both indoors and outdoors.
They’re called spider mites because they look a bit like mini spiders.
Finding these little critters on your favorite plants can be annoying.
A quick way to check for them is to put a piece of white paper under the leaves and gently shake the plant.
You might have spider mites if you see specks falling onto the paper. These little guys come in different colors like white, brown, red, yellow, and green; there are many types – around 1,200 species!
This guide will walk you through some easy steps to spot, understand, and deal with spider mites.
By the end, you’ll know how to keep your plants happy, healthy, and free from these pesky pests.
What Do the Insects Look Like?
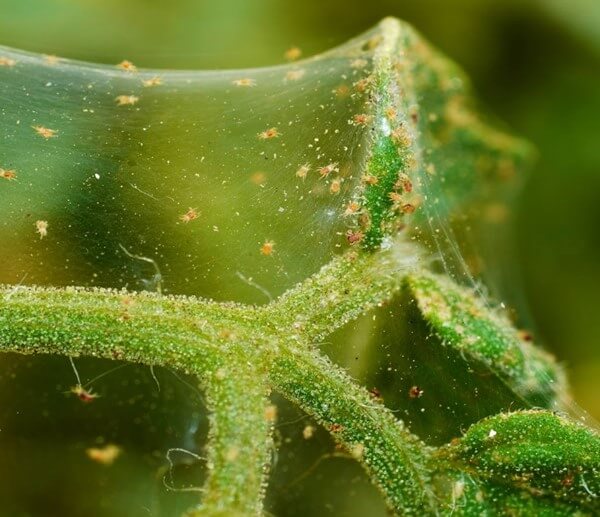
Spider mites might be tiny, but they come in various colors, making some easier to spot.
You’ll find common colors: black, green, white, and red. The white ones can be tricky to see because they make your plants look like they’re covered in dust.
It’s easy to mistake this dustiness for dirt or lack of water, but it’s the mites! That’s why it’s important to take a close look.
If you hold your plant up to the light and look closely, you might see these little mites moving around or notice their fine webbing.
These little pests have two distinctive black spots on their super tiny oval-shaped bodies, which are only about 1 mm long.
Spotting them can be challenging, but you can catch them in action with a keen eye.
The Life Cycle of Spider Mites
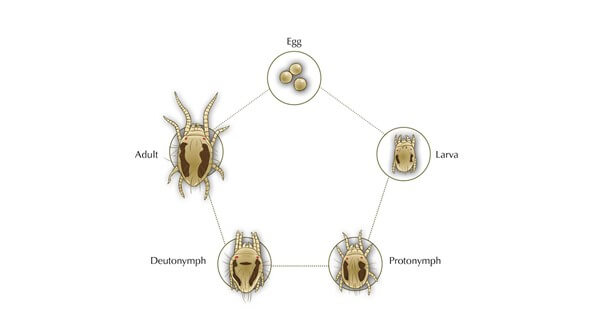
Spider mites are quick breeders, with their population capable of doubling every two weeks.
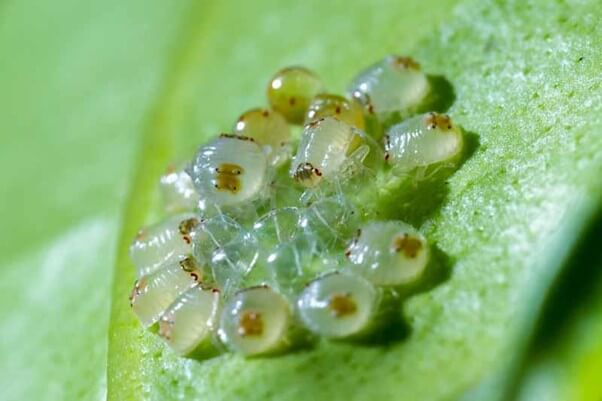
Their life cycle starts with a tiny egg, often found attached to spider mite webs under the leaves of your plants.
Adult spider mites lay these eggs, which hatch into six-legged larvae.
Interestingly, the fertilized eggs develop into female mites, while unfertilized ones become males.
Initially, these larvae are either colorless or transparent. As they begin feeding on the sap and tissue of the plant, they cause visible damage, such as spots on the leaves.
During this feeding stage, they change color, and those distinctive two black spots on their bodies become apparent.
Once they’ve fed enough, they enter a dormant phase, evolving into eight-legged creatures capable of spinning webs.
This development occurs through two stages, known as the protonymph and deutonymph stages, where they continue to learn web-making.
Finally, after a molting process, they reach adulthood, now fully equipped to reproduce and create webs.
The color of an adult spider mite can vary depending on the plant they feed on.
Their life cycle, from eggs to adulthood, lasts about four weeks. In just twenty days, they mature enough to reproduce.
Female spider mites are particularly prolific, laying hundreds of eggs over their lifetime, with up to twenty eggs daily after reaching maturity.
These pests are most active in reproducing during the warmer summer months.
How Do You Spot Spider Mites in Your Garden?
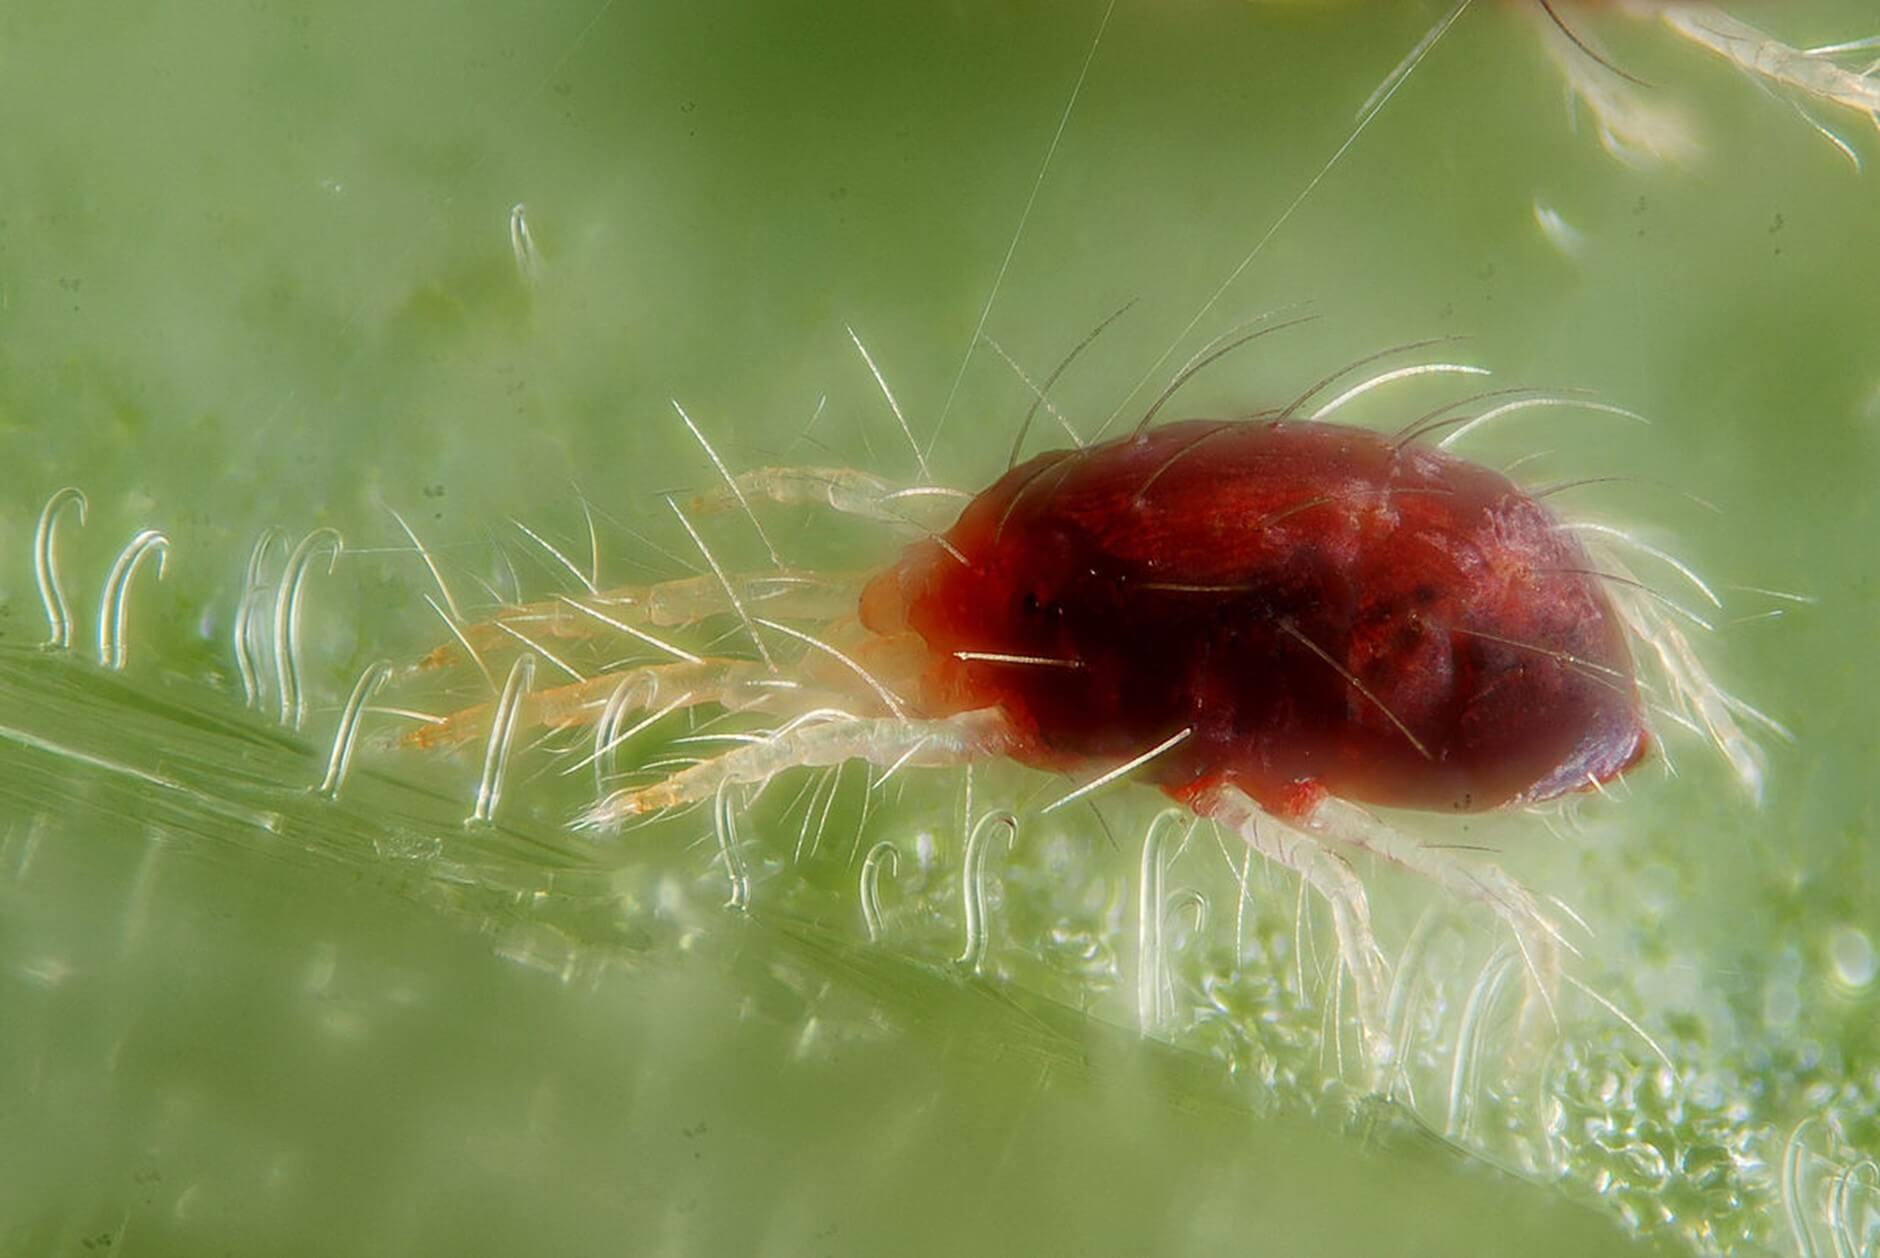
Spotting spider mites can be a detective game, but it’s not too hard once you know what to look for.
The most obvious clue is the webbing on your plants’ leaves. Spider mites create these webs for protection, making them a telltale sign of their presence.
Interestingly, spider mites are more active in summer. They love the heat, so that’s when you need to be extra vigilant.
Don’t worry – they’re not harmful to humans or pets, just to your plants.
Because they’re so small, you might need a magnifying glass to see them. Without it, they look like tiny moving dots.
But once you spot the webs, you’ll have a better chance of finding the mites.
If you notice damage to your plants, like discolored leaves, it’s time to start looking for these pests.
They feed by piercing the plant leaves, often leaving behind brown or white spots underneath.
The spider mites themselves are tiny, oval-shaped creatures with eight legs. Their eggs are even harder to see, being transparent and colorless.
A simple trick to confirm their presence is the white sheet test: shake your plant gently over a white sheet and see if any mites fall off.
This can be a clear indicator of an infestation.
The Impact of Spider Mites on Plant Health
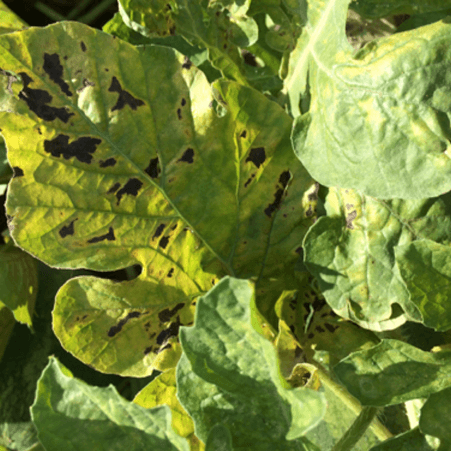
Spider mites can wreak havoc on your plants, and it’s crucial to understand the kind of damage they can cause.
The most visible sign of their presence is the damage to the leaves, which goes beyond just the webs they weave.
The leaves of infested plants often show scars or discoloration, turning from healthy green to brown or yellow.
This damage is due to the mites piercing the leaves to feed.
As the infestation worsens, the damage becomes more severe. Leaves may start falling off, and the plant’s overall health deteriorates.
This can affect the plant’s ability to produce fruit, and if it does manage to bear fruit, the quality may be poor.
Addressing a spider mite infestation as soon as you notice it is essential. The first signs to look out for are small spots on the leaves.
Over time, these spots can enlarge, causing the leaves to turn yellow, curl up, and eventually fall off.
Taking early action is key. Without intervention, these tiny pests can cause irreparable damage to indoor and outdoor plants, leading to the decline and possible death of the plant.
Where Do Spider Mites Come From?
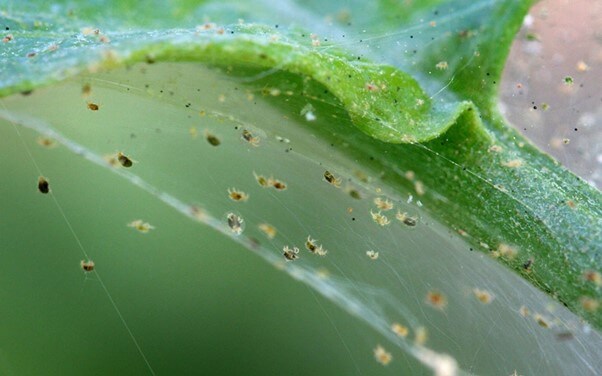
Understanding where spider mites come from can be a bit of a mystery, as these tiny pests can appear from seemingly nowhere.
However, there are a few common ways they find their way to your plants.
One typical source is new plants. When you bring home a plant from a garden center, it might already be hosting spider mites without realizing it.
Changes in your plant’s health might be your first clue that they’ve hitched a ride into your home.
Repotting can also introduce spider mites, especially if the soil is not sterile.
Being cautious when introducing new soil to your plants is always a good idea.
Believe it or not, you can accidentally bring spider mites home on your clothing after a visit to a garden or garden center. They’re that sneaky!
Your pets can also unknowingly transport these pests into your home. A simple walk outside could lead them to pick up spider mites and bring them indoors, where they can infest your houseplants.
Once spider mites establish themselves on one plant, they can quickly spread to others, leading to a larger infestation.
That’s why isolating new plants and inspecting them closely for signs of spider mites before introducing them to your garden or home is important.
Comprehensive Tips for Eliminating Spider Mites from Your Plants
When you discover spider mites on your plants, prompt action is crucial. Begin by cutting off any discolored or curled leaves to help improve the plant’s overall health.
Dispose of these leaves away from your garden to prevent re-infestation.
Several effective treatments can help you get rid of spider mites:
- Telephone Shower: Use this to wash away the mites and their webs. The water pressure can effectively dislodge the mites.
- Hot Pepper Treatment: Reports suggest that extracts from hot peppers, like jalapenos and bell peppers, can kill about 45% of adult spider mites. These extracts are readily available in markets or online.
- Insecticidal Soaps: Mix a teaspoon of insecticidal, liquid dish, or Castile soap with a liter of lukewarm water. Spray this mixture on the plants to suffocate and break down the mites. Repeat this process until the infestation is gone.
- Neem Oil: A natural and effective solution, neem oil disrupts the life cycle of spider mites. Mix two teaspoons of neem oil with one teaspoon of Castile soap and a liter of water. Spray this on the affected plants, focusing on areas where mites are most prevalent.
- Rosemary Oil: Like neem oil, rosemary oil can be an effective natural treatment. Mix one teaspoon of rosemary oil with a liter of water and spray it on your plants. This oil is safe for humans and pets but lethal for spider mites.
- Alcohol Solution: Isopropyl alcohol can wipe down affected plant parts. Mix a small amount of alcohol with water and gently wipe the leaves. However, be cautious with the concentration to avoid leaf burn.
- Apple Cider Vinegar: Create a solution with a few drops of liquid dish soap, one and ¼ cups of vinegar, one tablespoon of baking soda, and a liter of lukewarm water. Spray this on the plants to kill the mites. Vinegar’s acidity is effective against them.
Regularly bathing and watering your plants can also help prevent spider mite infestations, as these pests thrive in dry conditions.
Maintain a balanced humidity level around your plants to keep these pests at bay.
Understanding the Role of Vinegar in Spider Mite Control
One question among garden enthusiasts is, “Does vinegar kill spider mites?” The answer is, indeed, vinegar, especially apple cider vinegar, can be an effective means to combat these tiny pests.
Its high acidity harms spider mites, making it a valuable tool for managing an infestation.
Here’s how you can use vinegar to tackle spider mites:
- Creating the Vinegar Solution: Mix apple cider vinegar with water at about 1:3 (vinegar to water). Adjust the concentration if necessary, but be mindful of the plant’s sensitivity.
- Add a Mild Soap: A few drops of a gentle liquid soap added to the mixture can help the solution adhere better to the plants, enhancing its effectiveness.
- Conduct a Patch Test: Before applying the solution to your entire plant, test it on a small area. After 24 hours, check for any negative reactions to ensure plant safety.
- Application Process: If the test area shows no harm, spray the vinegar solution onto the affected parts of the plant, reaching the undersides of the leaves where spider mites often reside.
- Regular Application: Since spider mites are resilient, you might need to apply the vinegar solution multiple times for full eradication.
While the answer to “Does vinegar kill spider mites?” is a yes, it’s crucial to use this method cautiously.
Vinegar is potent, and overuse or excessive concentration can damage your plants. Remember, it’s a contact solution, so it needs to hit the mites directly to be effective.
Incorporating vinegar use as part of a broader strategy, as outlined in this guide, will give you a more comprehensive approach to your fight against spider mites.
Preventing Spider Mite Infestations: Humidity Control and Vigilance
Maintaining the right humidity level is key to preventing spider mite infestations.
These pests prefer dry and hot environments, so keeping the air around your plants more humid can create unfavorable conditions for them.
Here’s how you can manage it:
- Maintain Moist Soil: Ensure the soil of your plants is consistently moist. Water your plants regularly, but allow the soil to dry slightly between waterings to avoid overwatering, which can cause other issues.
- Use Humidifiers: If you’re dealing with dry indoor air, consider using a humidifier near your plants. This can help mimic a more tropical, mite-resistant environment.
- Regular Plant Checks: Always inspect new plants before bringing them into your home. Look for signs of spider mites, such as webbing and discolored or curled leaves. It’s much easier to deal with an infestation on a single plant than to control its spread throughout your home.
- Isolation for New Plants: When you bring a new plant home, keep it isolated from your other plants for a few days as a precaution. This gives you time to observe it for any signs of pests or diseases that could spread to your other plants.
Following these steps can greatly reduce the risk of a spider mite infestation and keep your indoor and outdoor plants healthy and thriving.
Conclusion
Dealing with spider mites can be a challenge, but with the right knowledge and tools, it’s manageable.
Remember, the key to controlling these pesky mites lies in early detection, proper plant care, and effective, safe treatments.
Whether you choose natural remedies like neem oil and rosemary oil or more traditional methods like insecticidal soaps, the goal is to create a healthy environment for your plants inhospitable to spider mites.
Regular checks, proper humidity levels, and careful isolation of new plants can go a long way in preventing infestations.
Happy gardening!

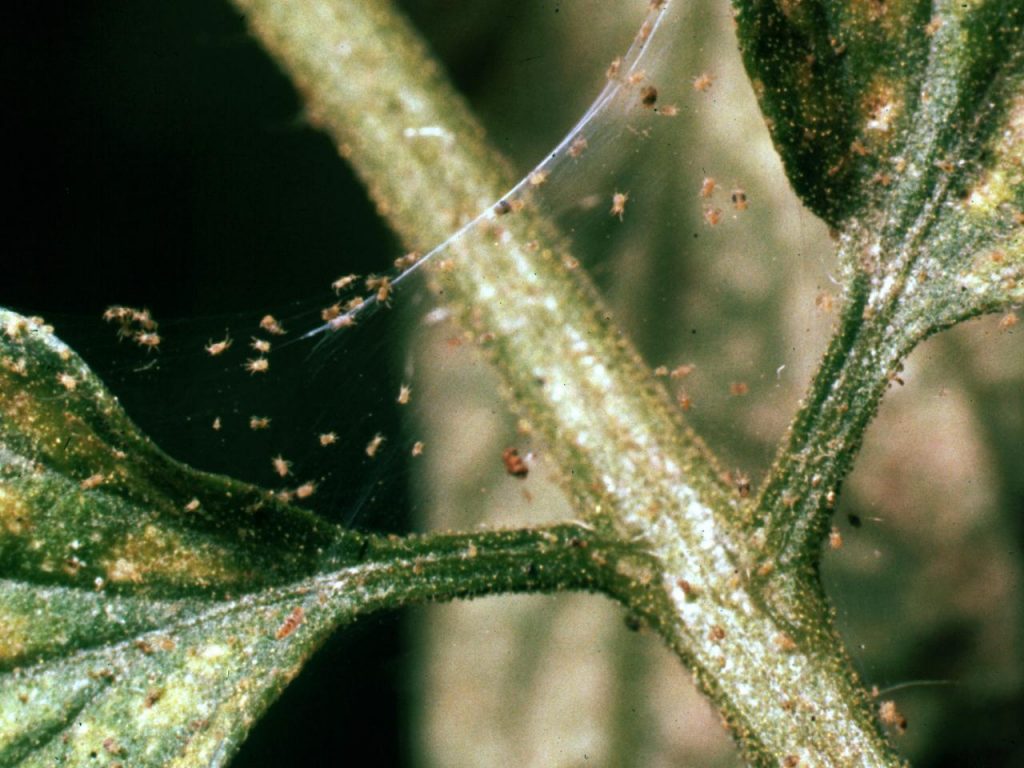
This pest – Virburnum hedges shrubs (not flowering kind) and azaelias I have found a very effective remedy (kills the pest but feeds the plant) – 2 2 weekly sprays fixes the problem. The recipe – is 100g full cream milk powder mixed with 2 litres of warm water and sprayed on the effected plants. Generally the plant is in poor health, due to little or no care – no ferts and lack of attention.